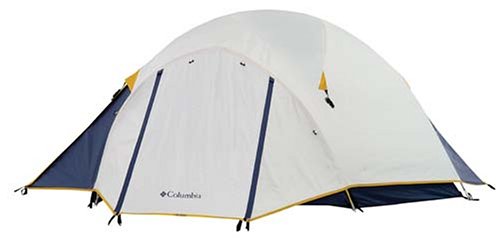
Columbia Hawk Ridge 10- by 7- Foot Three-Person Dome Tent
 Columbia Sportswear Company was founded in 1938. Columbia Sportswear Company began as a small family-owned distributorship and today Columbia is one of the world's largest outerwear companies. The history begins with Paul and Marie Lamfrom. They fled from Germany and settled in Portland, Oregon. Paul and Marie opened up a hat distributorship and named their company the Columbia Hat Company. They took the name from the nearby Columbia River. Today, their 82 year old daughter, Gert, is the Chairman of the Board and her son, Tim Boyle is President and Chief Executive Officer. Columbia Sportswear Company has a wide-range of stylish, and functional products to choose from. Columbia is famous for their Interchange System. This concept was developed in 1982 and made Columbia a leader in the outerwear industry. Columbia first started with an interchange jacket which was made for hunting and featured a weatherproof outershell with an insulating inner jacket that could be worn together or separately, thus making each parka three or four garments in one. Because of the popularity of this garment, Columbia applied the same concept to a ski parka and called it the Bugaboo™. The Bugaboo became one of the best-selling ski jackets in history. In 1991, Columbia developed a waterproof, breathable coating Omni-Tech which makes it now the second-largest user of waterproof, breathable fabric in the world.
Customer Review: Wrong product description
The product description section contains the description of the company and how it is founded. I would have agreed about this irrelevant description of it would have been a third party seller. However, its sold and shipped by Amazon. So amazon should correct this.
Customer Review: really good
after i test the tend is confortable easy to set up I'm happy with it we are family that enjoy outdoor life I think that I pay good price for a good tend. Columbia Hawk Ridge 10- by 7-Foot Three-Person Dome Tent M'Caceres
Building a camp fire is a skill every man should have. In this article we will cover the quickest, easiest ways to build and use your camp fire; and to prepare your fire site so you will leave no trace when you're done.
Prepare a safe fire site
Every year uncontrolled fires destroy acres of wilderness, many of them are caused by careless campers, you hear about it all the time. Don't be that guy! A safe fire site is one in which nothing will burn but the fire you've build. Choose a spot where the flames cannot spread. If you're at a KOA, park, or a common camp ground, there are usually large metal or stone rings, grills, or fireplaces. Use these existing fire sites whenever possible. Even if a fire site is all ready made an available to you, you should still make sure the perimeter of the fire site is clear of flammable materials.
If a preexisting fire site is not available, pick a spot on gravel, sand, or bare soil, which is away from trees, brush, dry timbers, or anything else that is combustible. Check overhead to make sure that there are no branches that could ignite or get damaged by smoke.
Clean the site clear of pine needles, twigs, and leaves that may catch fire by a flying ember. A fallen branch can make a decent rake to help, keep the ground cover set aside so you can put it back before you break camp and leave. Make sure you have a pot of water near the fire site in case of an emergency.
If you're camping on a meadow or other grassy area, use a shovel to cut around and under a 2-3 foot wide square of sod. Try to keep the sod intact and place it in a shady area. Sprinkle the cut out piece of sod with water; it should stay healthy enough for you to replace it when you leave.
Now that you have prepared your fire site, you will need to gather and prepare your materials. You will need to gather tinder, kindling, and fuel for your fire. Tinder is you fire starter. A match is not going to get your fire going by itself. You need tinder to light the kindling in order to burn fuel.
Wood shavings, crumbled bark, and pine needles all make great tinder. You will want to collect about enough to fill a ball cap once, although I don't recommend using your hat. My personal favorite is to use a small amount of dryer lint, especially if other forms of tinder are in short supply.
Kindling is any dry, dead twigs about as thick as a pencil. If you are having a hard time finding kindling, you could carefully use your camp axe or hatchet to trim off small pencil size pieces from your larger fuel logs. Just stand the log up long ways like you're going to split it, and cut with the grain. These will light easily from the burning tinder. You will need to gather enough to fill a hat twice.
For fuel you can use any dry, dead timber that is as thin as your finger or as thick as your arm. Make sure to use dead wood as live wood has too much moisture to burn well. Some parks and campgrounds will have fuel wood cut and ready for you.
Be sure to gather enough materials so you don't have to search for more while your building your fire. By the time you get more and come back the fire may be out and then you'll have to start all over. You can boil water with a quick fire using just a few handfuls of sticks. For a larger meal you may need a couple of arm loads of wood.
If you plan of staying more than a few nights, you may want to gather all your fuel on the first day. Cut the wood into 1 foot long pieces and stack them out of the way. If there may be rain be sure to cover the wood with a tarp or trash bag.
Building the fire
Now we will go over the various ways to arrange your tinder, kindling, and fuel so that a single match will get the camp fire going. We will start with the Tepee Fire Lay.
To make a Tepee Fire Lay, place a handful of tinder in the middle of your fire site. Next, lean your pieces of kindling up against one another like the poles of a tepee. Be sure to use plenty of kindling. Add larger sticks for fuel around the kindling. Be sure to leave a small door on the side of the fire that the wind is blowing against. This will allow oxygen to reach the inside of the fire and feed it. Light the tinder through the door you left. The tinder should light the kindling which will light the larger fuel sticks. Keep feeding the fire kindling and fuel to keep it going.
Perhaps an easier way to build a camp fire is the Lean-to Fire Lay. First lay your one piece of the larger fuel wood down on the center of your fire site. Place a handful of tinder on the ground against the middle of the fuel wood. Then, lean your kindling over the tinder up against the fuel wood. Be sure to use plenty of kindling. Lean a few pieces of fuel wood over the kindling. Light the tinder from the side, and continue feeding the camp fire kindling and fuel.
You could also use the Crisscross Fire Lay. To build a this type of camp fire you will need to lay down 2 pieces of fuel wood next to one another about six to eight inches apart. Put a handful of tinder in between the two pieces of fuel wood and then lay your kindling horizontally over the tinder using the two pieces of fuel wood to hold up the kindling. Again, use plenty of kindling. Light the tinder and keep feeding the camp fire kindling and fuel.
Making a fireplace for cooking
The simplest way to make a small fireplace for cooking with one pot or skillet is the 3 Point Fireplace. It's real easy. Just stick 3 unused, metal tent stakes in the ground around a small campfire. They will need to close enough together to hold your pot. Because most tent stakes are not very tall, and most pots that you will be carrying are not very wide, this fireplace will work best on a small Tepee Fire Lay used to boil water.
For a larger fire used for cooking with multiple pots or skillets, a Hunters Fireplace will work better than the 3 Point Fireplace. To make a Hunters Fireplace, start by making a Lean-to Fire Lay. Once the fire is sustained, place a second log on the side of the fire perpendicular to the first log. The two logs will hold up your pots. Eventually the fire will consume the two logs so watch your pots carefully.
For cooking in open, windy terrain, a Trench Fireplace can be used. A Trench Fireplace also allows you to break camp without leaving a trace of the fire you built. Using a camp shovel, cut out and under a strip of sod about 6 inches wide by 2 feet long. Place the strip of sod in the shade and moisten it with water. Dig a trench a foot deep and save the dirt so you can replace it when you break camp. Putting the dirt on a ground cloth or garbage bag will make it easier to replace. Build your fire in the trench. When the fire is cold out refill the trench with the soil and lay the sod back in place. Moisten the sod with water and the site should heal quickly.
Extinguishing your fire
You must be responsible when building a camp fire. You will want to make sure to completely extinguish every fire when it's no longer needed. Use plenty of water and stir the embers and ashes until the fire is cold. If watering the fire is not an option. Work sand and soil into the coals and keep stirring the soil into the fire until it is out. Make sure all the embers burning are cold before leaving the site.
Replace the ground cover and try to remove any evidence that you were there. Make sure to be considerate of future campers by leaving your campsite the way you found it. Take nothing but pictures, leave nothing but footprints.
Camping doesn't have to be expensive. Browse our inventory of discount camping gear.
Richard F. DeGray II
http://www.TacticalHuntingAndCamping.com
posted by allegria--vhkioqxi at 9:31 PM
0 comments
![]()
